

AFTER >> BEFORE
Oh Photoshop. I love a love/hate relationship with you. Ever since the infamous Britney Spears album cover & Candies Ads (where they dramatically changed the shape of her body), it’s been a hot & touchy subject.
When it comes to photoshop, I stick to my gut (no pun intended). In general my photoshop style is very natural. So while i will make the skin look it's best, I’ll keep the "Photoshop" action minimal. I rely on my strategic poses, lighting and angles to accentuate the positive and play down "problem" areas . I WILL edit out minor blemishes/skin flaws as well as simple things like under-eye circles and small scars if requested. My main rule of thumb is, if it’s permanent, it stays. This includes tattoos.
Many women ask about the retouching of stretch marks. While I firmly believe that your stretch marks are a part of your story and therefore are beautiful, I also understand many women’s aversion to their own. Our standard skin smoothing process will fade the appearance of stretch marks, but if you want them to be removed completely, or left 100% alone please be sure to tell me at your photo shoot. It’s all about your personal preferences.
So how does this all translate to your photos? Here are 2 examples so you can see my step-by-step Photoshopping process.
Example 1 is a self-portrait I recently took — it’s more of a beauty than a boudoir image. The crop is kind of boring so the first thing I’ll do is crop the image for a more pleasing look.

Next, I’ll zoom in to the face to remove any blemishes, bumps, stray hairs, etc. I luckily was having a pretty good skin day that day so there’s not that much to remove, but there are some red bumps, and I do have a few beauty marks that read as blemishes in photos, so I removed those too.

Before Blemish Removal
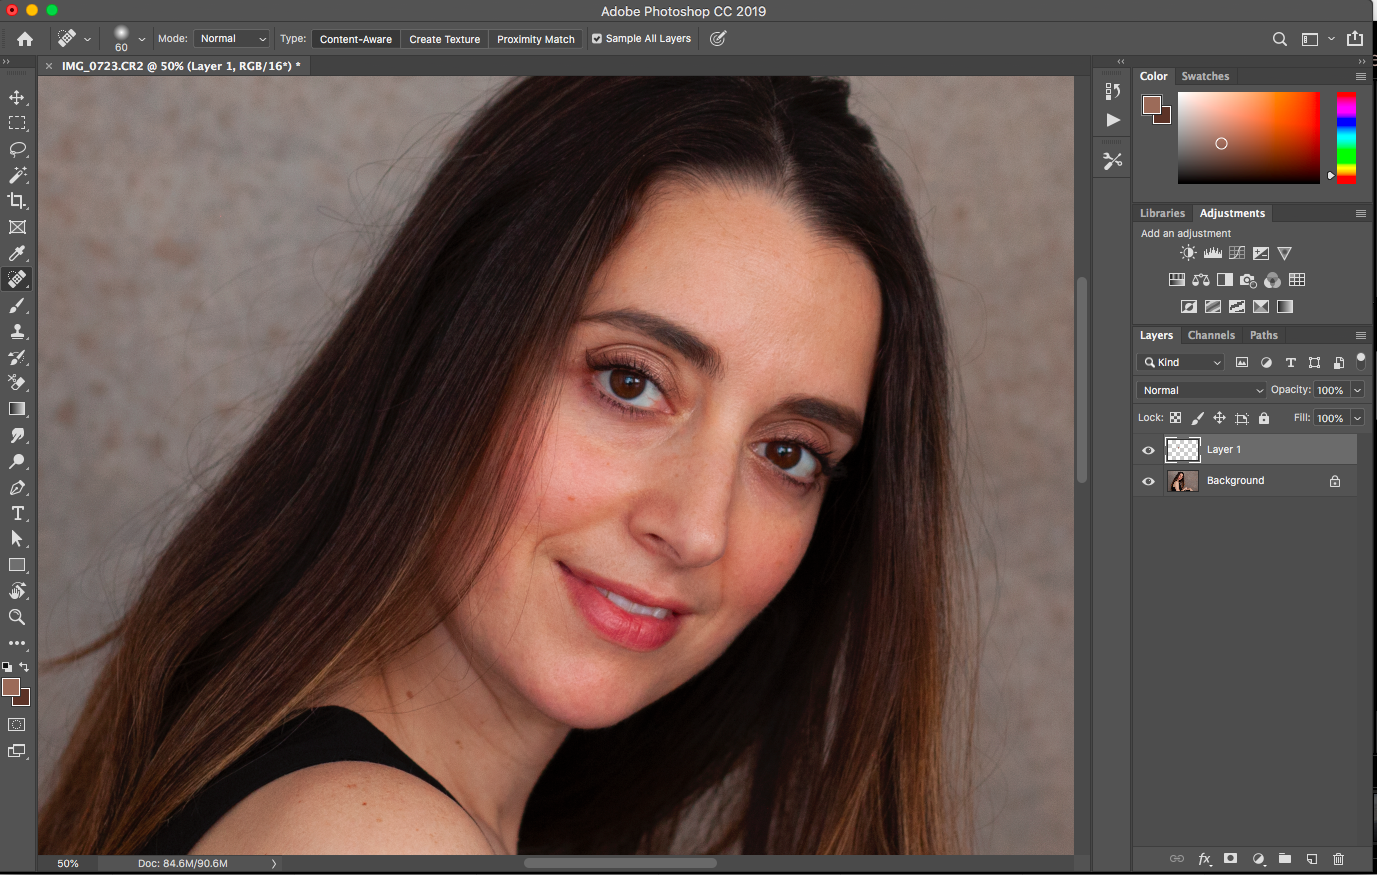
After blemish removal
Next I’ll smooth out undereye circles and even out skin texture and tone, as well as add sharpness to the eyes. The image is definitely starting to look more polished, but not plastic-y.

After skin-evening and under-eye circle removal. I may have gone slightly overboard here for the sake of illustration (and maybe some vanity on my part) #keepingitreal.
Next I’ll check out the body to tweak a few things that are bugging me out. The strange bump on my wrist, for example needed to go! I also lowered the neckline of the jumpsuit a touch to add some more skin, tightened the underside of my chin a touch and plumped up my hair, particularly around the part at the top. Little things like this make the body look better without changing the shape of the body at all!
Finally I’ll add some grain, contrast and darken the background a bit so that the subject stands out even more. And there you have it! The finished product. Not super different than the original, just a bit more polished overall. The side by side at the top of this blog page shows you the 2 images next to each other.

The finished image.
Next, here is a boudoir self portrait so I can illustrate how I might tweak a body. Once again, the goal is to get as much as possible right in camera and not depend on photoshop. The light and then pose are key to this photo working and being flattering to the body.

The image as it came out of the camera.
There are just a few things I would tweak here: the bumps along the back from the bodysuit bunching up are bothering me, so I will smooth those out. Clients are often shocked to hear that when I do smoothing like this, or like a a tight bra strap digging into a shoulder, I actually PLUMP the skin that’s being pinched, as opposed to slim the rest of the body to meet it. I also flattened the tummy a touch, as if I was inhaling at the moment the shutter snapped, and smoothed the texture at the top of my bent leg. The final step is to convert to black and white and adjust the tones until I’m happy with the final image — blowing out the background so that the focus was on the body and not the building was one thing that was important here.
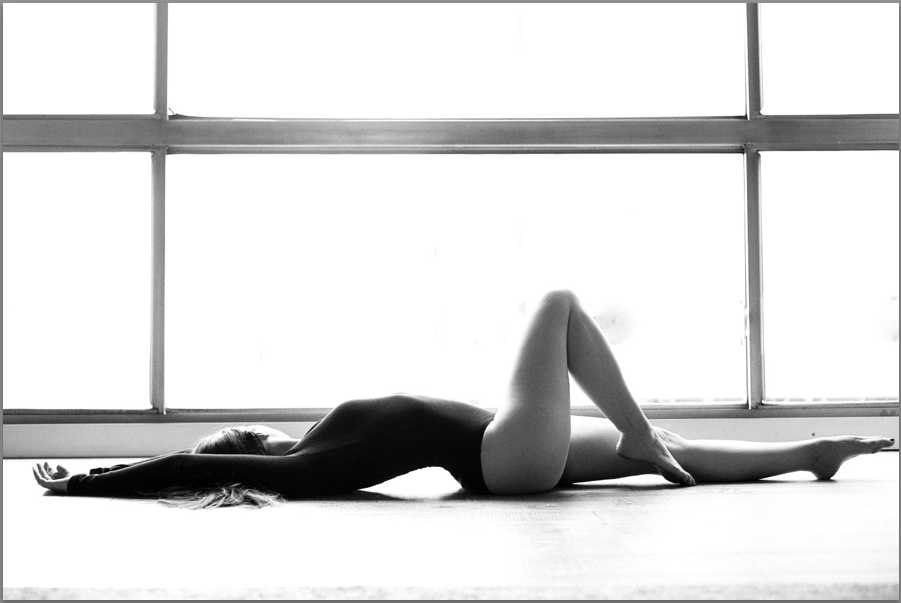
The finished product
So there you have it! With just a few touches we keep you looking like you on your most polished, well-rested, “skinny” day. The most important thing when it comes to photoshop is that you are comfortable with the approach. Some women want to look “flawless,” others want to embrace their so-called flaws and celebrate themselves just as they are. Most women fall someplace in the middle, just like I do. I don’t want to create an illusion of perfection (perfection = boring in my eyes) but I don’t want a zit or a bunchy top to distract you from seeing your true beauty. We’ll always talk about your preferences ahead of time, which I’ll address accordingly when editing.
What are your thoughts on photoshop/facetune and similar retouching programs? I’d love to hear in the comments below.